
My friend Ann did this for her wedding and it turned out beautifully! Ann ended up doing this for her save the dates, but this can easily be converted into an invitation. This project is beyond easy and super cheap.
 |
| Photo Credit: Ann's Personal Photo |
Fingerprints
Supplies:
- Ink Pad
- Ruler
- Paper Towels
**For the ombre invitation tutorial, click HERE**
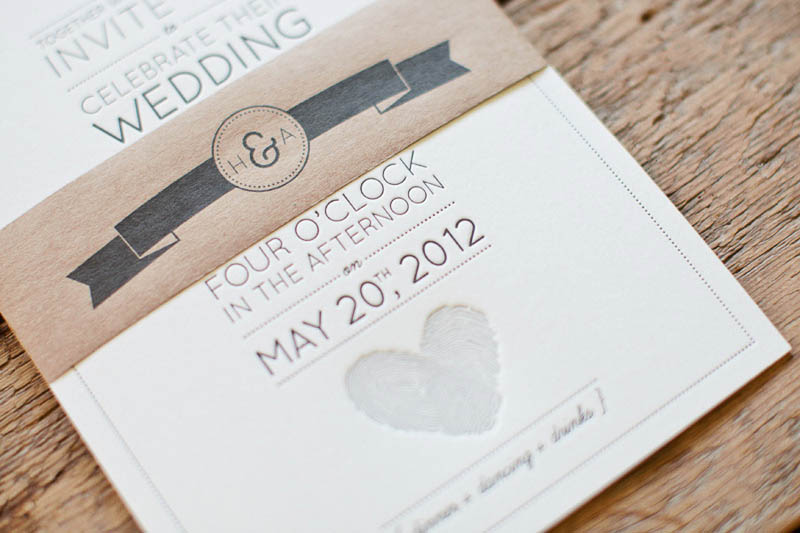 |
| Photo Credit: Oh So Beautiful Paper |
Step One: Print First
...If you're deciding to print out the invitation details on your computer, do this first! This will allow you to leave space for your fingerprints without having the to smudge the ink.
...If you're writing out your invitations, do this before too, just to avoid smudging the ink.
Step Two: Takes Two to Tango
...Now, this is the rare occasion where he will need to be involved. That's the whole fun of this project! Once you have designated the area of where you are going to put the fingerprints, take your index finger and press it onto the ink pad. Immediately transfer it to the invitation before it gets dry. If you are wanting to add stamped letters, similar to Ann's, ago ahead and do this here too.
I know how stressful planning can be, so if you need a little pick me up, watch this video. It's hilarious and will guarantee to brighten your day!
Happy planning!
With Love,
Olivia Mae
No comments :
Post a Comment